What Are the 4 Stages of Injection Molding? A Complete Process Guide
braydonpaul
November 16th, 2025
Are you evaluating manufacturers for your plastic parts and wondering what actually happens during injection molding? While the process might seem like a simple “inject and eject” operation, professional injection molding involves precise stages that determine part quality, durability, and cost-effectiveness.
This guide breaks down the 4 stages of injection molding in plain language, showing you what happens at each phase and what to look for when partnering with a manufacturer.
We’ll walk through clamping, injection, cooling, and ejection — the four fundamental stages — plus the critical sub-steps that professional manufacturers use to ensure precision and repeatability. Understanding these stages helps you make informed decisions about manufacturing partners, timelines, and quality expectations for your project.
What are the 4 stages of injection molding?
The 4 stages of injection molding are:
Clamping — The two mold halves close and lock under high pressure to prevent material leakage during injection.
Injection — Molten plastic is injected into the sealed mold cavity at controlled speed and pressure, filling the part design completely.
Cooling — The plastic solidifies inside the mold as cooling channels remove heat, determining final part strength and dimensional accuracy.
Ejection — The mold opens and ejector pins push the finished part out, completing one cycle before the process repeats.
Professional manufacturers add intermediate steps like dwelling (holding pressure during early cooling) and mold alignment to ensure consistent quality across thousands of cycles.
Understanding the Injection Molding Cycle Overview
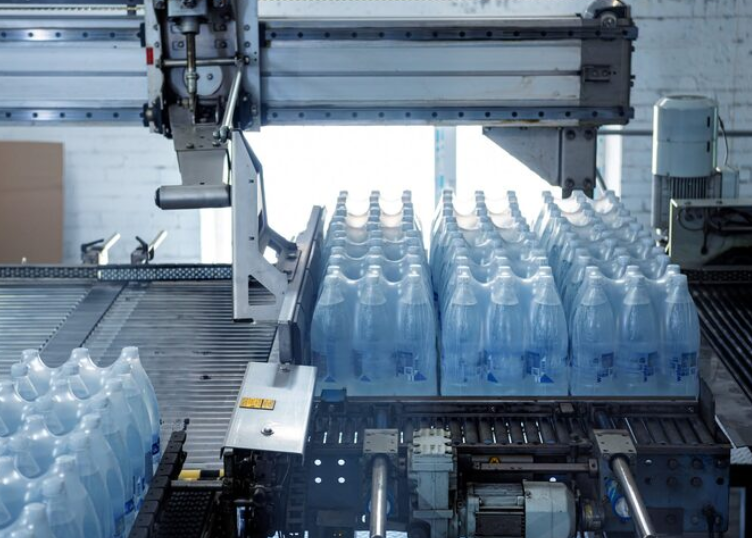
Injection molding is a manufacturing process where thermoplastic pellets are melted and injected into precision mold cavities under high pressure. The molten material cools and solidifies into the exact shape of the mold, creating consistent parts that can be reproduced thousands or even millions of times.
Most injection molding cycles complete in 10 to 100 seconds depending on part complexity, with simple parts cycling in 10-30 seconds and larger, complex parts taking up to two minutes. Understanding the four stages helps you evaluate manufacturer capabilities, set realistic production timelines, and identify potential quality issues before they become costly problems.
You’ll see the injection molding process described as either four core stages or expanded six to seven steps depending on the level of detail. Both approaches are correct. The four-stage model (clamping, injection, cooling, ejection) covers the primary phases, while expanded versions break out sub-steps like holding pressure and mold seating as separate stages.
Why understanding these stages matters for you:
Quality indicators — Each stage has specific parameters that affect part strength, appearance, and dimensional accuracy
Timeline expectations — Knowing that cooling takes 50-80% of cycle time helps you plan production schedules realistically
Cost factors — Cycle time directly impacts per-part cost, and stage optimization can significantly reduce manufacturing expenses
In our facility, we monitor cycle-to-cycle consistency across temperature, pressure, and timing parameters. This data tracking ensures every part meets the same tolerance requirements, whether it’s the first piece or the ten-thousandth.
Stage 1: Clamping and Mold Preparation
Clamping is the first stage where the two halves of the mold close and lock together under tonnage pressure. One mold half remains stationary while the other moves on a platen to meet it, creating a sealed cavity ready for molten plastic. The clamping unit applies continuous force throughout injection and cooling to keep the mold halves tightly closed.
Clamping force prevents “flash” — unwanted material that leaks at the parting line between mold halves — and ensures your parts maintain dimensional accuracy. Without sufficient clamping pressure, even small gaps can allow material to escape, creating thin fins of excess plastic that require costly secondary trimming operations.
Injection molding machines calculate required clamping tonnage based on the projected surface area of your part, typically ranging from 2 to 8 tons per square inch depending on material type and part geometry. Larger parts with greater surface area need more clamping force. Materials that flow easily at lower viscosity require higher tonnage to prevent leakage.
Before injection begins, manufacturers perform a mold alignment and seating step to ensure both halves mate precisely. This alignment verifies that cores, pins, and cavity details match perfectly. Some technical references list mold seating as a separate fifth stage, though it’s functionally part of the clamping process.
Clamping force requirements by part size:
Part Category
Projected Area
Typical Clamping Force
Small parts
Under 10 sq in
20-80 tons
Medium parts
10-50 sq in
80-400 tons
Large parts
50-200 sq in
400-1,600 tons
Insufficient clamping creates defective parts and wasted material. If you receive sample parts with thin material flashing along edges, ask yourcustom mold maker about their clamping force calculations and whether the machine tonnage matches your part requirements.
Stage 2: Injection of Molten Material
The injection stage is where your part truly begins to take shape. Heated plastic is forced through a nozzle into the mold cavity at high pressure, filling the entire space in just seconds. The injection molding machine uses a rotating screw inside a heated barrel to both melt and push the material forward.
Injection speed and pressure must be precisely controlled — too fast causes burning or air traps, while too slow results in incomplete fill or “short shots” where the cavity doesn’t fill completely. The machine’s hydraulic system monitors and adjusts these parameters in real time during each cycle.
Material temperature ranges vary significantly by plastic type. ABS requires barrel temperatures between 200-240°C, while polypropylene needs 220-250°C. Using temperatures outside these ranges leads to material degradation, discoloration, or flow problems that create defects in your finished parts.
Shot size refers to the volume of material injected in one cycle. This calculation must account for your part volume plus the runner system and gates that deliver material to the cavity. Insufficient shot size creates incomplete parts, while excess material wastes resources and increases cycle costs.
Our technicians adjust injection parameters based on real-time pressure monitoring at the nozzle and inside the cavity. This data helps us eliminate common defects like short shots, sink marks where material shrinks unevenly, and weld lines where two flow fronts meet but don’t bond properly. According to the Society of Plastics Engineers, proper injection parameter control is one of the most critical factors in producing consistent, high-quality molded parts.
Injection quality checklist:
Verify material temperature matches datasheet specifications — Out-of-range temps cause flow issues or material breakdown
Confirm shot size covers part volume plus 10-15% for runner system — Prevents short shots and ensures complete fill
Monitor injection pressure stays within machine and mold limits — Excessive pressure damages molds and creates flash
Check fill time achieves 95-99% cavity fill before packing phase — Ensures uniform density and minimal voids
Stage 3: Cooling and Solidification
Cooling is the longest stage in the injection molding cycle, accounting for 50 to 80 percent of total cycle time. During this phase, the molten plastic inside the mold gradually loses heat and transforms from liquid to solid state. The part must cool sufficiently to hold its shape before ejection, but overcooling wastes time and reduces manufacturing efficiency.
Cooling channels machined into the mold circulate temperature-controlled water or oil to extract heat from the plastic. These channels run close to the cavity surface to maximize heat transfer. The cooling system design directly impacts both part quality and production speed.
Cooling rate affects crystallinity in semi-crystalline plastics, influencing mechanical properties like strength and stiffness. Materials like nylon and polyethylene are more sensitive to cooling rate than amorphous plastics like ABS or polystyrene. Fast cooling can create internal stresses that lead to warping or cracking over time.
The holding pressure sub-phase occurs during early cooling. Even after injection stops, the machine maintains pressure on the material as it begins to solidify. This pressure compensates for material shrinkage that naturally occurs as plastic cools, preventing voids or sink marks in thick sections.
Faster cooling means higher throughput and lower per-part costs. However, rushing this stage creates quality problems. Insufficient cooling causes parts to deform during ejection. Uneven cooling produces warpage where different sections cool at different rates. Balancing speed against quality requires careful process control.
Five factors affecting cooling time:
Part wall thickness — Thicker sections take exponentially longer to cool than thin walls
Material thermal properties — Some plastics conduct heat better than others and solidify faster
Mold temperature — Lower mold temps speed cooling but may affect surface finish
Ambient conditions — Shop temperature and coolant temperature influence overall cooling performance
Stage 4: Mold Opening and Part Ejection
Once cooling is complete, the clamping force releases and the mold halves separate, exposing the solidified part. The movable platen pulls back while the stationary side remains in place. This opening sequence must happen smoothly to avoid damaging delicate part features or thin walls.
Ejection methods vary based on part geometry and complexity. Ejector pins are most common — these pins push against the back of the part to release it from the mold core. Stripper plates work better for parts with large flat surfaces, applying even pressure across the entire face. Air blasts can assist ejection for simple parts that release easily.
Parts naturally shrink slightly as they cool, which helps them pull away from cavity walls. However, undercuts, texture, or complex geometries can cause parts to stick. Ejector pins must apply enough force to release the part without creating marks, stress points, or dimensional distortion.
Common ejection defects include visible ejector pin marks on the part surface, parts sticking to the mold requiring manual removal, and dimensional distortion from ejecting parts before they’ve cooled sufficiently. White stress marks around pin locations indicate premature ejection or excessive pin force.
After ejection, the runner system and gates that delivered material to the cavity must be trimmed away. Some molds use hot runner systems that keep these channels molten, eliminating this secondary operation. Cold runner systems require manual or automated trimming.
Quality inspection happens immediately after ejection. Visual checks identify surface defects, flash, or incomplete fill. Dimensional verification uses calipers or gauges to confirm the part meets tolerance requirements. First-article inspection for new molds involves detailed measurement of all critical dimensions before production begins.
Ejection quality indicators:
Do This
Not This
Inspect first parts for pin marks or stress whitening
Assume process is stable without visual checks
Verify parts eject cleanly without manual assistance
Ignore sticking parts that require operator intervention
Measure critical dimensions within first 10 cycles
Wait until end of run to discover dimensional issues
Check part temperature at ejection stays above minimum
Eject as soon as mold opens to maximize speed
Choosing an Injection Molding Partner: What to Look For
Understanding the four stages of injection molding gives you the foundation to evaluate manufacturers effectively. The questions you ask and the capabilities you verify directly impact your project’s success, quality consistency, and long-term costs.
Start by asking about cycle time consistency and process monitoring. Manufacturers who track temperature, pressure, and timing data across every cycle can demonstrate repeatability. Request examples of their process control documentation or statistical process control charts. This data proves they monitor quality continuously rather than catching defects after production.
Material certifications matter for regulated industries and high-performance applications. Ask whether they provide material certificates of analysis, maintain proper storage conditions to prevent moisture absorption, and follow material supplier guidelines for processing temperatures. Manufacturers who cut corners on material handling create parts that fail prematurely or don’t meet specifications.
Watch for red flags during manufacturer evaluation. Unwillingness to discuss their process controls or quality procedures suggests they lack robust systems. Unusually low pricing without clear explanation often means they’re skipping steps — inadequate cooling time, insufficient quality checks, or inexperienced operators. If a quote seems too good compared to others, ask specifically what’s different about their process.
Key capabilities separate good manufacturers from average ones. Look for mold design support that identifies potential issues before tooling begins. Material selection guidance helps you balance performance requirements against cost. Secondary operations like assembly, ultrasonic welding, or finishing work performed in-house streamline your supply chain and reduce handling damage.
Local manufacturing in Northern Utah offers advantages over overseas sourcing for many projects. Direct communication eliminates time zone barriers and language complications. Shorter lead times mean faster prototyping iterations and quicker response to design changes. You can visit the facility, inspect first articles in person, and build relationships with the engineers running your parts.
When evaluating quotes, ask about their process monitoring technology. Manufacturers using cavity pressure sensors, mold temperature controllers, and automated inspection systems can demonstrate real-time quality data. This equipment investment shows commitment to consistent output rather than reactive troubleshooting.
Manufacturer evaluation checklist:
[ ] Documented quality control procedures with statistical process monitoring
[ ] Willingness to share process parameters and capability studies
[ ] Material handling systems including proper storage and drying equipment
[ ] Engineering support for DFM analysis and material selection guidance
[ ] Secondary operations capabilities to reduce your vendor count
[ ] Clear communication about lead times, minimum order quantities, and pricing structure
Is plastic injection molding the right choice for your custom parts—or will the upfront costs outweigh the benefits? That’s a fair question. Tooling can run into the tens of thousands…
Need parts made to your exact specs—not pulled from a catalog? That’s where custom manufacturing comes in. The global injection molding market hit $295 billion in 2024 alone. Much of…
The global plastic injection molding market is projected to reach $419.1 billion by 2030. But as demand grows, so does pressure to address environmental concerns. Is plastic injection molding actually…
If you work near injection molding machines or plan to source molded parts, you may wonder: is plastic injection molding safe? The short answer is yes—when facilities follow proper precautions.…
What if you could get a plastic that takes a beating but doesn’t drain your budget? Good news—several options fit that bill. HDPE costs around $0.60–$1.00 per pound. Yet it…
Need a plastic part that won’t crack, shatter, or fail under pressure? Choosing the right material can make or break your product. Here’s a fact that might surprise you: Some…
What do plastic bottles, rubber bands, and your own DNA have in common? They’re all made of polymers. These long chains of molecules form the materials we use every day.…
The global injection molded plastics market is projected to reach over $423 billion by 2030, according to Grand View Research. That number tells a simple story: plastic parts are everywhere.…