How Do You Calculate Shot Size in Injection Molding? Formula, Worked Example, and Press Fit
Justin Brown
November 5th, 2026
Your mold is built and ready to run. It goes in the press, and the first shot comes out short. The barrel couldn’t hold enough plastic to fill the mold in one cycle. That problem is easy to avoid with a quick calculation before the mold ever ships.
Every molded part starts as one shot. A shot is the melted plastic pushed into the mold each cycle. Get that number wrong, and even a perfect mold makes bad parts.
This guide shows you how to calculate the shot size in injection molding, step by step. You’ll get the formula and a real example you can copy with your own numbers. At Freeform Polymers, we recommend a press size when we review your part design.
First, we explain the key terms that get mixed up in quotes. Then we walk through the formula and a worked example. After that, you’ll see how to check your shot against a press. We finish with the common mistakes that throw the math off.
How Do You Calculate Shot Size in Injection Molding?
To calculate shot size, add up all the plastic your mold needs to fill in one cycle. Here’s how:
Find the part weight. Pull the part volume or weight from your CAD model.
Multiply by the number of cavities. A 4-cavity mold needs four parts’ worth of plastic.
Add the runner and sprue. On a cold runner mold, this plastic gets molded every shot too.
Add a small safety margin. Many molders add about 10% to the total.
Compare the shot to the press. Divide your shot by the barrel capacity. Most molders aim for about 20–80% of capacity, often near the middle.
If the press is rated in ounces of polystyrene, convert first. Your plastic may take up more or less barrel space than polystyrene.
One point trips people up. Your shot size is set by the mold, not the press. The cavities, runners, and part design decide how much plastic each cycle needs. The press only has to fit that number.
Below, we run real numbers through each step. You’ll see a 4-cavity part go from CAD weight all the way to a press check.
Shot Size vs. Shot Weight vs. Barrel Capacity: What’s the Difference?
These three terms sound alike, but they measure different things. Mixing them up in a quote can put your mold on the wrong press.
Term
What it means
Common units
Shot size
The amount of plastic the mold needs each cycle
Cubic inches or cm³ (sometimes given by weight)
Shot weight
That same amount of plastic, measured by weight
Grams or ounces
Barrel capacity
The most plastic the press can push in one shot
Ounces or grams of polystyrene, or cm³
Shot size and shot weight describe your mold. Barrel capacity describes the machine. Your job is to match the first two to the third.
The catch is that people use these words loosely. You may hear “shot size” when someone means shot weight. Before you compare any number to a press, ask which unit it’s in.
The Shot Size Formula, Step by Step
The math has two sides. One side is your mold, and the other side is the press. Here are the formulas in plain terms.
Final shot = shot weight × 1.10 (adds about a 10% margin)
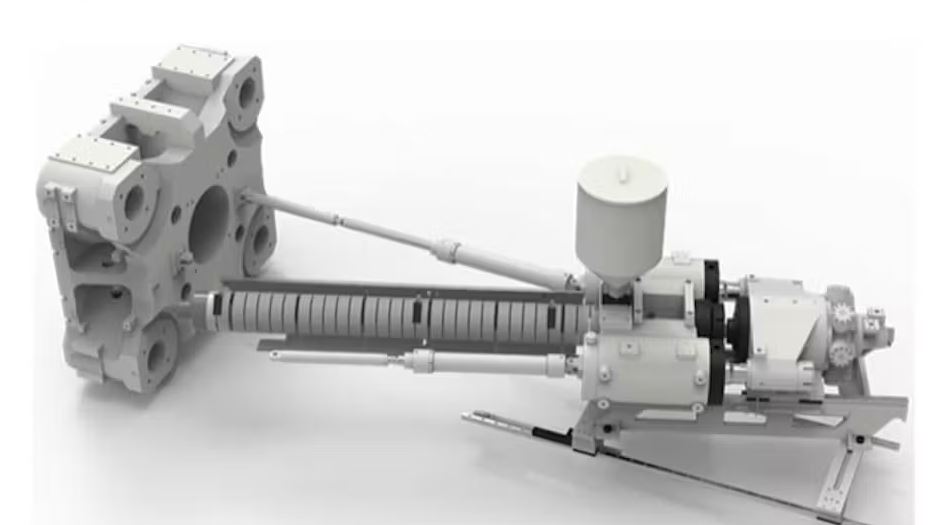
Barrel volume = π × screw diameter² ÷ 4 × stroke
% of barrel used = final shot ÷ barrel capacity × 100
The mold side. Start with one part. If your CAD model gives you volume, multiply it by the plastic’s density to get weight. Then multiply by the cavity count and add the runner and sprue.
The margin. Add about 10% on top of that total. This covers small leaks past the screw’s check valve and gives the melt room to stay even.
The press side. Barrel volume is the space the screw sweeps as it pushes forward. Screw diameter and stroke length set that size. Most machine spec sheets list this capacity, so you rarely need to work it out yourself. For a quick refresher on the screw and barrel, see how an injection molding machine works.
The check. Divide your final shot by the barrel capacity, then multiply by 100. That gives you the percent of the barrel each shot uses. Keep both numbers in the same unit, either weight or volume.
Use solid density for part weight. When you compare two plastics in the barrel, use melt density instead. We cover why in the conversion section below.
Worked Example: A 4-Cavity Part From Start to Finish
The formula is simple. Seeing it with real numbers makes it click.
Say you have a small ABS part that weighs 20 grams. Your mold has 4 cavities and a cold runner. Here’s how the shot adds up.
Step
Line item
Value
Running total
1
Part weight (ABS)
20 g
20 g
2
Multiply by 4 cavities
20 g × 4
80 g
3
Add cold runner and sprue
12 g
92 g
4
Add 10% margin
9.2 g
About 101 g
Now check it against a press. Say the machine is rated at 8 ounces of polystyrene, which is about 227 grams. ABS and polystyrene have nearly the same density, both solid and melted. So you can compare the numbers directly.
101 g ÷ 227 g × 100 = about 45% of the barrel
That sits well inside the 20–80% range
This shot fits the press with room to spare. These numbers are an illustration, not a spec for your part. Run your own CAD weight, cavity count, and runner size through the same steps.
How to Convert a Polystyrene-Rated Press to Your Plastic
That works for ABS. Switch to a lighter plastic and the math changes.
Many presses are rated in ounces or grams of polystyrene (PS). The rating tells you how much PS the barrel holds. Lighter plastics like polypropylene (PP) take up more barrel space per gram. So a gram of PP uses more of the barrel than a gram of PS.
There’s one more catch. The barrel holds melted plastic, and melted plastic is less dense than solid plastic. So the conversion has to use melt density, not room-temperature density.
PS-equivalent = your shot weight × (PS melt density ÷ your plastic’s melt density)
Say your shot weighs 101 grams again, but this time the part is PP. PS melt density is about 0.945 g/cm³. PP melt density is about 0.74 g/cm³.
ABS
PP
Solid density
About 1.05 g/cm³
About 0.90 g/cm³
Melt density
About 0.94 g/cm³
About 0.74 g/cm³
Shot weight
101 g
101 g
PS-equivalent
About 102 g
About 129 g
% of an 8 oz (227 g) barrel
About 45%
About 57%
The PP shot uses much more of the barrel, even at the same weight. Melt density often isn’t on the data sheet, so ask your resin supplier or molder for it. Some machine spec sheets also list capacity for more than one plastic, so check the sheet before you convert.
What Happens When the Shot Doesn’t Fit the Barrel?
So what actually goes wrong when the shot doesn’t fit? Problems show up at both ends of the range.
Barrel used
What happens
Under about 20%
Plastic sits in the hot barrel too long and can break down
About 20–80%
The working range, and many molders prefer 40–60%
Over about 80%
Plastic may not melt fully, and the screw takes longer to refill
Some experts use a tighter 25–65% range. It matters most for plastics like PP that take more heat to melt.
Too small. When a shot uses little of the barrel, each bit of plastic stays heated through many cycles. That extra time can break the plastic down. You may see discolored parts, black specks, or brittle parts.
Too big. When a shot uses most of the barrel, the plastic gets less time to melt evenly. Unmelted pellets can end up in your part. The press also needs a little stroke left over for the check valve to seat and to hold a cushion.
The cushion is the small amount of melted plastic left in front of the screw after each shot. It lets the press keep pressure on the part while it packs and cools. Without it, parts may not pack out fully. That can lead to short shots and other molding defects.
What Changes Your Shot Size?
Your shot size isn’t fixed. A few design choices move it up or down, and each one can change which press fits your part.
Cavity count. More cavities means more plastic per shot. Going from 2 cavities to 4 doubles the part weight in each cycle. Cavity count also shapes your minimum order quantity.
Runner type. On a cold runner mold, the runner and sprue are molded every shot. A hot runner keeps that plastic melted, so less of it adds to the shot.
Material. Denser plastics weigh more for the same part. Lighter plastics take up more barrel space per gram.
Shot size also feeds into your part price. It affects press choice, material use, and cycle time. Learn how to calculate injection molding cost with those numbers in hand.
Common Shot Size Mistakes
Small slips in the math can put a mold on the wrong press. These are common errors in shot size numbers.
Forgetting the runner and sprue. On a cold runner mold, that plastic is part of every shot. Leave it out, and your total comes up short.
Using a polystyrene rating without converting. A PS rating only matches your plastic if the densities are close. For lighter plastics like PP, convert to a PS-equivalent first.
Skipping the safety margin. A shot calculated to the exact gram leaves no room for normal process swings. Add about 10%.
Running at the very top or bottom of the barrel. A shot under about 20% or over about 80% invites problems. Aim for the middle of the range when you can.
Converting with room-temperature density. Plastic takes up more space when it’s melted than when it’s solid. Use melt density for any conversion, or ask your molder to check the numbers.
Matching Your Part to the Right Press at Freeform Polymers
At Freeform Polymers, we review your part design and recommend the mold material, gate layout, and press size together. That way, you catch a fit problem on paper, not on the shop floor.
Our Cache Valley shop molds both small and large parts. Some parts are the size of a fingernail. Others are the size of a dashboard.
The fit gets proven on the press, too. During mold sampling and testing, our first-shot trials include short fills, full shots, and packed parts. That shows how the mold fills and where it might short shot. A later trial runs a stable batch, often 30 or more shots in a row, to confirm the process.
To get a faster answer, send these with your quote request:
Part weight or CAD file
Cavity count
Runner type (hot or cold)
The plastic you plan to use
Ready to check your part? Contact us and request a quote or call us at (435) 774-9090 today and let’s get started with your project!
Your mold is built and ready to run. It goes in the press, and the first shot comes out short. The barrel couldn’t hold enough plastic to fill the mold…
Your mold quote comes back higher than you planned. One line item says “2 side actions.” You never asked for those, so where did they come from? The reason is…
You need 400 parts for a product launch. The first quote comes back with a 10,000-part minimum. Now you face a hard choice. You can buy parts you don’t need,…
Your circuit boards are finished. Your enclosure is molded. Screws, cables, and labels are coming from four different suppliers. Someone still has to turn that pile of parts into one…
You asked for a smooth, nice-looking part. Then the samples came back shiny, and every fingerprint and tiny dent showed. The mold did exactly what it was told. It just…
Your first sample parts look great until you flip one over. There’s a rough nub right on the face your customer sees first. That nub is where the plastic came…