What Is the Typical Shrinkage Rate in Injection Molding?
You design a part to be exactly 100 mm long. The first samples come back at 98.5 mm. Nothing went wrong on the press, and the mold wasn’t built wrong.…
For centuries, printing anything meant making a physical master first. That master could be carved type, a stone, a metal plate, or a screen. Every change meant building a new one. Swap a single word or color, and the old plate became scrap.
The cost of that master also stayed fixed. It cost the same whether you printed ten pieces or ten thousand.
Then that requirement went away. This article walks through the history of digital printing step by step. It starts with the first plate-free machines and ends with the systems that now print directly onto molded plastic parts.
We begin with the methods that came before and the limits they carried. From there we cover the turning points, decade by decade. Then we look at where the method stands today. We close with how it works alongside pad printing on real parts, and which jobs suit each one.
At Freeform Polymers, we print on molded plastic parts every day. That makes the last stretch of this timeline the part we work in.
Digital printing sends a design straight from a computer file to a surface, with no plate in between.
1930s–1950s: Research proved an image could form without a plate. Chester Carlson invented the xerographic process in 1938. A Swedish inventor, Rune Elmqvist, patented an early ink jet device in 1948.
1950s–1970s: Copiers reached the office. Haloid Xerox introduced the Xerox 914, the first successful plain paper copier, in 1959. In the mid-1960s, Richard Sweet at Stanford broke an ink jet into a steady stream of charged droplets.
1990s: Digital printing became a production method. The Indigo E-Print 1000 and the Xeikon DCP-1 were both shown at the Ipex show in September 1993.
2000s–today: UV inks and industrial inkjet carried printing onto plastics. Inca Digital’s Eagle, one of the first UV flatbeds, arrived in the early 2000s for rigid materials.
Each stage removed a physical step. The result is printing that changes as fast as a file does.
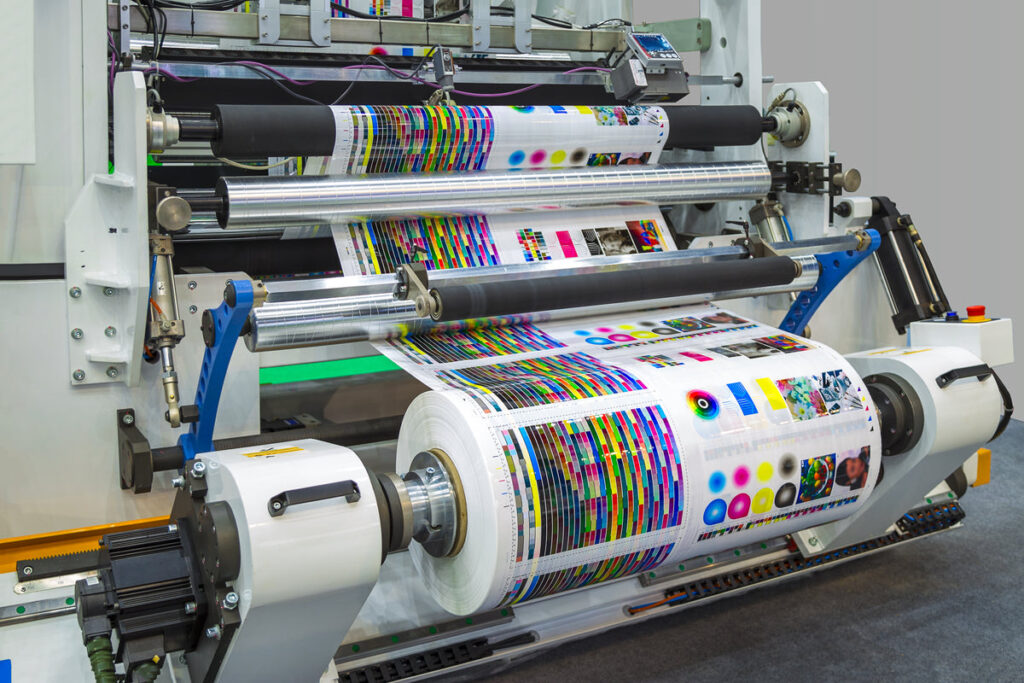
Digital printing sends a design from a computer file straight to a surface. No plate, screen, or pad sits in between. The file is the master. That one trait separates it from every method that came before it.
Older methods share a single requirement. Something physical has to exist before the first piece prints.
Digital printing skips that step. Change the file, and the next piece prints differently. No new tooling, and no wait.
Digital printing decorates a surface, while 3D printing builds an object. They are not the same thing.
Keep the plate-free idea in mind as you read on. Every milestone ahead is one more step toward removing a physical setup step.
| Method | What it needs first | Best fit |
| Offset | Printing plates | Long runs of the same flat piece |
| Screen | A screen for each color | Bold, simple color on flat or gently curved items |
| Pad | An etched plate and a silicone pad | Curved, recessed, or textured surfaces |
| Digital | Nothing but the file | Short runs, full color, and pieces that change |
For centuries, printing meant building a physical master first. That master might be movable type, a carved stone, a metal plate, or a screen. Nothing printed until it existed.
That master cost money to make. The cost stayed the same whether you printed ten pieces or ten thousand. Spread across a long run, it barely registered. Spread across fifty pieces, it swallowed the job.
Small changes carried the same weight. One new word meant a new plate. One added color meant another plate on top of that.
Three-dimensional objects made the problem worse. A flat plate cannot press evenly against a curve. Pad printing grew out of that gap. Engineers in Switzerland developed its modern industrial form during the 1950s and 1960s. They needed a way to move ink accurately onto irregular shapes.
Three limits of plate printing:
Every one of those limits traces back to one thing. A physical master had to exist before anything could print. The next few decades chipped away at that requirement.
The shift did not arrive all at once. It came as a series of steps, each one removing a little more of the physical setup.
Pad printing grew up alongside all of this. It kept its etched plate, but put that plate to work on shapes flat presses could not reach. Both methods still decorate parts today, which keeps pad printing vs. digital printing a live question. The advantages of pad printing hold on curves and textures that digital methods still find hard.
Every machine above printed on paper. That is not what made them matter. Each one proved a computer file could drive a print head with no plate in between. The surface would come later.
Through the 1980s, plate-free printing stayed mostly an office convenience. The 1990s changed what it was for.
At the Ipex show in September 1993, Indigo showed the E-Print 1000 and Xeikon showed the DCP-1. Each was a first of its kind. Together they marked the start of commercial color digital printing. The E-Print 1000 printed straight from a computer file, with no plate to make. Short color runs finally made sense. A job of two hundred pieces no longer carried tooling built for fifty thousand.
Variable data arrived with it. Elements like text, graphics, and images could change from one piece to the next without stopping or slowing the press. A run could carry a different serial number on every single piece.
The economics flipped. On short jobs, run length stopped driving the cost per piece. What you printed started to matter more than how many.
Quality was the last objection, and it faded too. Digital output closed most of the gap with plate-based printing. Offset still holds an edge on certain work, but it stopped being the automatic choice.
What changed in the 1990s: Three shifts
Short runs are where this lands hardest in manufacturing. A pilot batch of a few hundred parts has to absorb the full cost of any plate made for it. The same math governs mold tooling, which is why choosing the right run size matters before you build anything. Many manufacturers print early samples digitally, then move to a plate-based method once a design settles into full production.
All of this still assumed one thing about the surface. It was flat, and it would soak up ink. Plastic does neither.
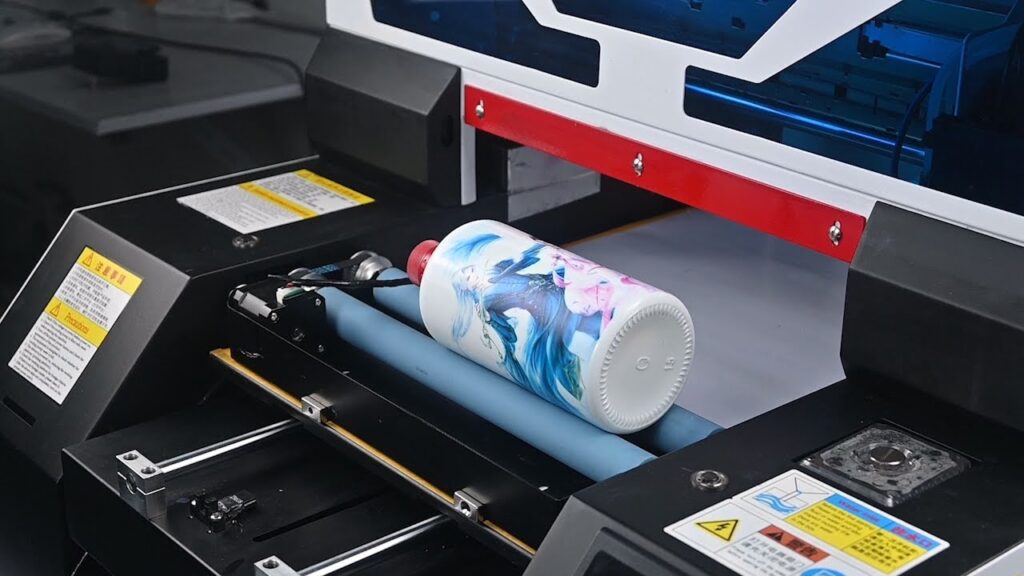
Paper cooperates with ink. It drinks the ink in, and the image locks into the fibers. Plastic does neither. Ink built for paper just sits on a molded part and rubs off.
UV-curable ink solved that. UV light strikes the ink film. Photoinitiators inside absorb that energy and start a reaction. The ink links into a solid, cross-linked network. It hardens on contact instead of soaking in, and holds on surfaces that would never absorb ink at all.
Industrial inkjet handled the rest. Print heads got precise enough for parts, not just posters. Fixtures and part handling caught up, so the same spot got printed every time.
Direct-to-object printing came next. Flatbed printers now handle moderate curvature, rotary attachments print cylinders of constant diameter, and robotic printers manage mixed shapes. Flat sheets stopped being the ceiling.
What this made possible on molded parts:
Every one of those happens after the part leaves the mold. Our plastic injection molding services and our printing run under one roof, so parts don’t ship out to be decorated. The applications of digital printing show where this lands across different industries.
Geometry is only half of the routing decision. Surface energy is the other half. Plastics like polypropylene hold ink poorly on their own, so the surface gets flame or plasma treated first. Skipping that step is the common reason ink lifts off a part months later.
There is an honest limit. Digital printing works best on flat or gently curved surfaces. Curved, textured, or recessed parts are usually a better fit for pad printing. We run both, which is how we tell which one your part needs.
That brings the timeline to the present. So where does digital printing stand against the older methods today?
Look across the whole timeline and one pattern holds. Each stage removed a physical step. The plate went first, then the flat surface, then the porous one. Cost stopped being tied to how many pieces you ordered.
Digital printing is a standard production method now. It is not the backup plan or the budget option.
It also did not replace what came before. Pad printing and screen printing are still the right answer on plenty of parts. The three methods split along surface shape, run size, and color count. We run pad and digital printing side by side for that reason.
That gives you a simple way to decide. Look at your part’s geometry first. Then count your colors. Those two answers point at the right method almost every time.
Development keeps pushing the same direction. In wide-format graphics, older, slower machines are giving way to fewer, higher-output systems in single-pass formats. AI and automation are reshaping what these lines cost to run. Ink chemistry keeps widening, and part handling keeps getting tighter.
| Your situation | Likely method | Why |
| A curved, textured, or recessed part with a one- or two-color logo | Pad printing | The silicone pad reaches shapes flat methods cannot |
| A flat or gently curved part with full-color or photo-quality artwork | Digital printing | No plate, and extra colors add no setup cost |
| A small batch or prototype you may still revise | Digital printing | No tooling to build, and none to rebuild when the design changes |
Not sure which method fits your part? Our team will look at your geometry and artwork and tell you straight. Call (435) 774-9090 or request a quote today!