The History of Pad Printing: From Watch Dials to Plastic Parts
Justin Brown
July 31st, 2026
Look at the numbers on a watch face. Or the logo on a golf ball. Or the markings on a medical device button. Each mark sits on a curved surface. Flat printing presses cannot reach a curve like that. Solving that one problem is what created pad printing.
This guide walks through the history of pad printing, from its early roots to the machines running in shops today. We print marks on molded plastic parts every day at Freeform Polymers. This backstory is not just trivia to us. It explains why the process still works the way it does.
We’ll start with where the method came from. Then we’ll trace how the pad itself changed. That one material swap did most of the heavy lifting.
By the end, you’ll know why a decades-old method still earns a place next to newer printing options.
When Was Pad Printing Invented?
Pad printing has roots going back centuries, but the modern version took shape in the mid-1900s. Early forms decorated pottery and watch dials by hand. The big change came in the late 1940s and early 1950s. The Murray Curvex process brought machine-driven printing to curved dinnerware in the British pottery industry. That machine still used gelatin pads. Gelatin was soft, but it wore out fast and reacted to heat and humidity.
Beginning in the 1960s, silicone pads replaced gelatin. Silicone picked up ink well and released it cleanly. It also held its shape across long runs. That one swap turned pad printing into a steady production process for plastic parts.
Where Pad Printing Started
A flat printing press needs a flat surface. Press a plate against a curved bowl and the image smears. For a long stretch of history, that left one option for decorating pottery. Someone painted it by hand.
Hand-painting worked, but it was slow. It also drifted. The tenth piece in a batch rarely matched the first.
Watchmaking pushed the problem harder. A dial needs tiny numbers placed exactly right on a small, curved face. Swiss watchmakers needed those marks fast and identical every time. Hand-painting could not keep pace.
The answer, roughly two centuries ago, was a transfer step. Workers engraved the image into a copper plate by hand. Ink filled the engraved lines.
Then came the part that mattered. A soft, flexible carrier pressed onto the plate and lifted the ink out. Early versions used gelatin. That carrier then pressed onto the dial and released the image.
The softness is the whole trick. A soft carrier bends to meet a curve. A rigid plate never can.
Watch a machine run on our floor today and you’ll see the same three pieces. An engraved plate. A soft pad. Your part. The core idea never changed.
That early problem – reaching a curved surface – set up everything that came next.
The Murray Curvex Breakthrough
The first real machine answer arrived in the late 1940s and early 1950s. It came out of the British pottery industry, where curved dinnerware was still decorated by hand.
The Murray Curvex process arrived in the late 1940s and early 1950s. It was the first system to print curved surfaces by machine, repeatedly.
The machine used a gelatin pad, cast in a mold. It pressed the pad onto an inked engraved plate and lifted the image. Then it pressed that image onto a plate, bowl, or cup.
What made this matter was repeatability. A hand decorator varies across a batch. A machine cycle repeats. Pottery makers could now decorate curved ware at production speed.
The machine worked. The pad was still the weak link.
Gelatin picked up ink well but held onto some of it. Ink built up on the pad face. Industry accounts put a gelatin pad’s useful life at roughly 20 prints. After that it needed re-powdering or replacement.
Humidity made it worse. Pad quality shifted with the moisture in the air. A shop running in July did not behave like the same shop in January.
That pressure has not gone away. Pad condition still drives print quality. Shops check pad surface, hardness, and cleanliness between runs. A worn or dirty pad shows up on the part first.
Why Silicone Changed Everything
Beginning in the 1960s, silicone pads replaced gelatin. That swap turned a clever machine into a production process.
The difference is how each material handles ink. Gelatin absorbed part of the ink it picked up, so operators had to stop and clean the pad. Silicone does not hold on. It takes ink from the plate and gives nearly all of it back to your part.
A patent application filed in 1970 spells out why that mattered. On a running machine, there is no time to stop and clean a pad. Ink sitting in the plate would dry out during the pause.
Silicone also ignores the weather. The same job runs the same way in a humid August and a dry January.
Then there is shape. Silicone pads are cast in many forms and hardness levels. A soft pad wraps tightly around a compound curve. A harder pad presses ink down into a rough texture.
That range opened up surfaces gelatin could never reach. Recessed faces. Textured housings. Parts that curve in two directions at once. All of them show up on molded plastic parts.
Factor
Gelatin pad
Silicone pad
Ink release
Holds some ink back; needs cleaning every few prints
Releases nearly all ink; runs without stopping
Working life
Around 20 prints
Long production runs
Weather sensitivity
Shifts with heat and humidity
Stays stable
Surface range
Gentle curves
Curves, textures, recesses, compound shapes
The pad on a machine running today is a direct descendant of that 1960s change.
Once the pad problem was solved, the method spread fast.
You’ll see two names for it. Pad printing and tampo printing describe the same process. “Tampo” traces back to the word for pad, and tampography is the term used across much of Europe.
The method left ceramics and watch dials behind quickly. Anything small with an awkward surface became a candidate.
Today the process marks parts across many industries:
Medical devices – buttons, housings, and dosage markings
Automotive – switches, knobs, and interior trim
Electronics – connectors, keypads, and control panels
Toys – figures, dolls, and small molded parts
Appliances – control panels and dial faces
Promotional goods – pens, lighters, and golf balls
Plastics manufacturing drove most of that growth. More molded parts meant more parts needing a logo, a part number, or a warning mark.
Pad printing became a standard second step after molding. It runs on the same floor, right after the part comes out of the tool. We run pad and digital printing in-house for that reason.
How the Process Works Today
The modern cycle runs in five steps:
Ink the plate. An etched plate, called a cliché, holds your image in a shallow groove. Ink fills that groove.
Wipe it clean. A blade or sealed ink cup clears the surface. Ink stays only inside the etched image.
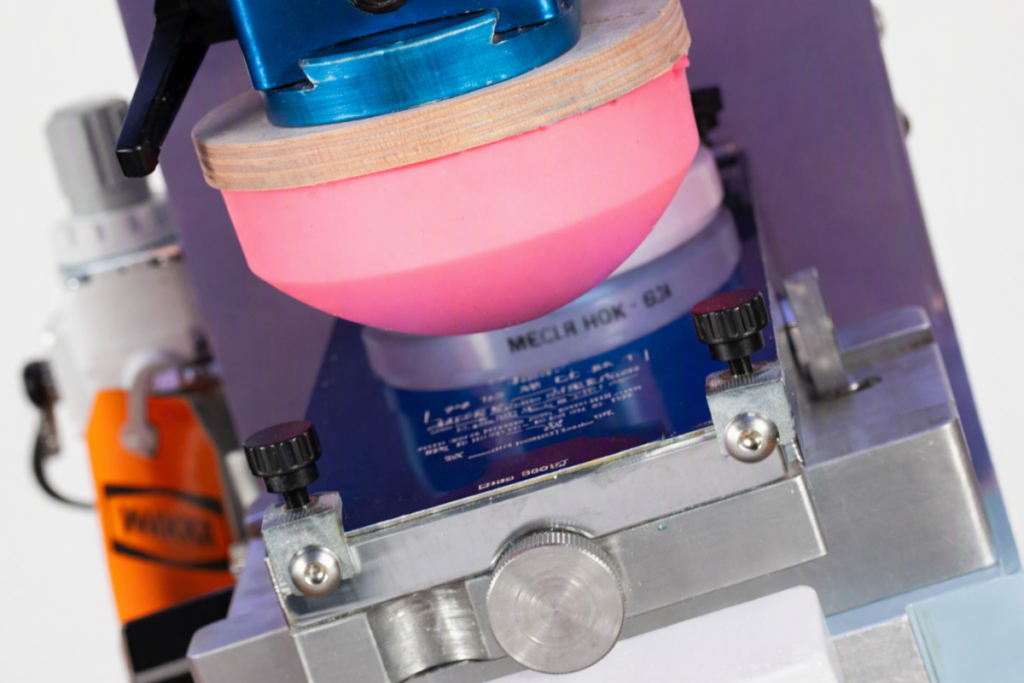
Lift the image. The silicone pad presses down and picks the ink out of the groove.
Print the part. The pad moves over your part and presses again, releasing the ink.
Cure the ink. Heat, air, or UV sets the mark, depending on the ink. Drying and curing are different steps.
Machines run this cycle automatically and hold the image in the same spot across long runs.
Shaped parts are where this earns its keep. A knob with a rounded face gives a flat printing method nothing level to press against. A textured housing does the same. The pad wraps the shape instead.
Why This History Still Matters for Your Parts
Pad printing is decades old and still running. That is not a habit. It solved a problem newer methods have not taken over.
Curved, textured, and recessed surfaces remain its strongest ground. A soft pad still handles a shape that a flat print head cannot reach cleanly.
Digital printing won a different territory. It puts full-color, photo-quality images on flat or gently curved parts with no plate to make. On a short run, skipping the plate saves real time and money.
So the choice is not about which method is better. It comes down to your part’s shape, color count, and run size. If run size is the open question, see our guide on how to choose the right run size.
Choose pad printing when…
Choose digital printing when…
Your part is curved, textured, or recessed
Your surface is flat or gently curved
You need a logo, part number, or small graphic
You need full color or photo-quality detail
Your run size is a production run
Your run is short, or a sample batch
You want lower cost per part once the plate exists
You asked for a smooth, nice-looking part. Then the samples came back shiny, and every fingerprint and tiny dent showed. The mold did exactly what it was told. It just…
Your first sample parts look great until you flip one over. There’s a rough nub right on the face your customer sees first. That nub is where the plastic came…
Your first sample parts just came back. They look right until you tilt one toward the light. Then you see it: a shallow dent sitting right over a rib. Nothing…
Your CAD model says 25.00 mm. Your first molded parts come back at 24.93 mm. Is that a problem, or is it normal? The answer depends on the tolerance you…
A part passes inspection and ships out on time. Weeks later, it cracks after a solvent wipe or a tightened bolt. Nothing was wrong with the design. The stress was…
You design a part to be exactly 100 mm long. The first samples come back at 98.5 mm. Nothing went wrong on the press, and the mold wasn’t built wrong.…